<
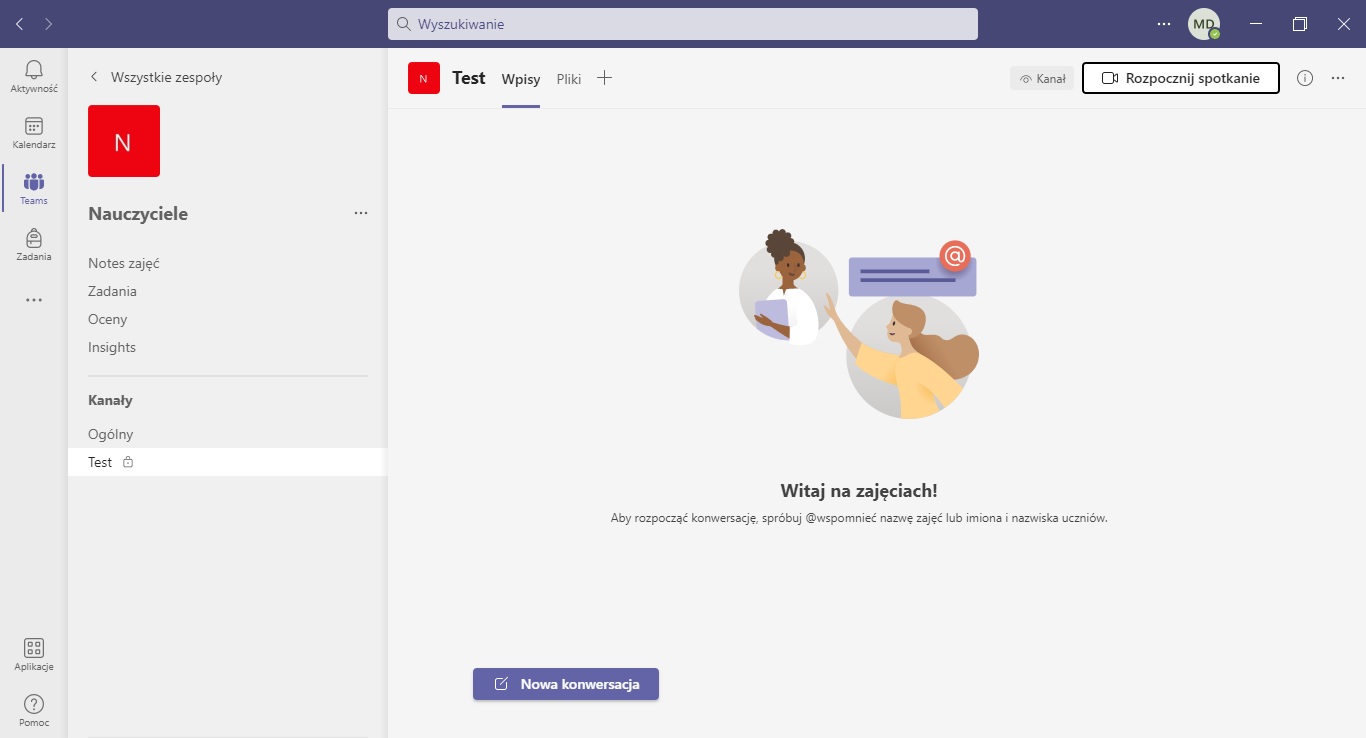
1/10. Aby rozpocząć nowe spotkanie, należy wybrać kanał w ramach danego zespołu, a następnie wybrać opcję znajdującą się w prawym, górnym rogu ekranu: Rozpocznij spotkanie.
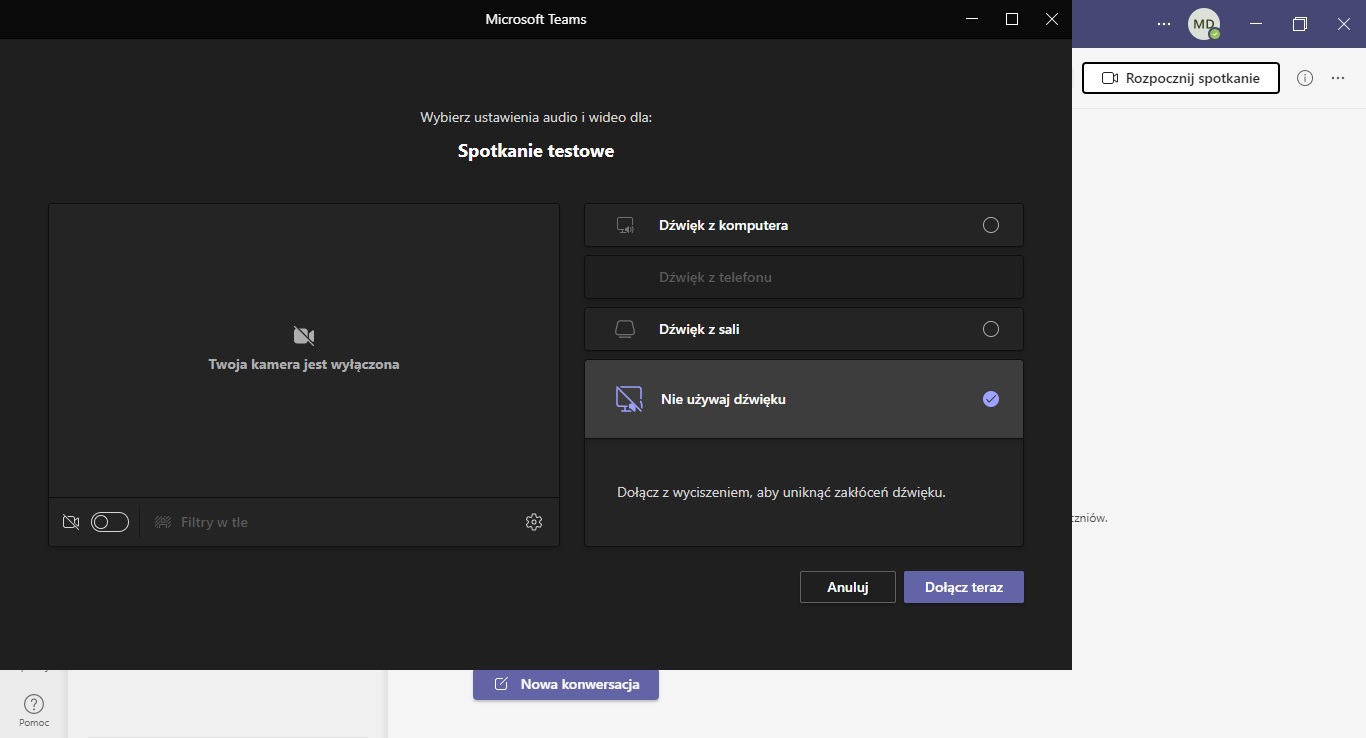
2/10. W wyświetlonym oknie należy nadać nazwę spotkania oraz wybrać, czy po podłączeniu ma być udostępniany obraz z kamery oraz dźwięk z mikrofonu.
Zalecane jest, aby rozpoczynać spotkanie z wyłączoną kamerą oraz dźwiękiem.
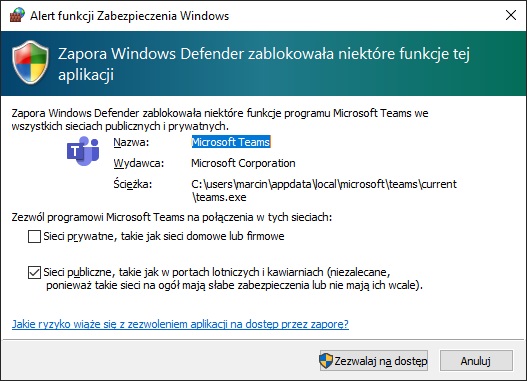
3/10. Przy pierwszym połączeniu może wyświetlić się monit zapory systemu Windows.
Należy wybrać opcję "Zezwalaj na dostęp".
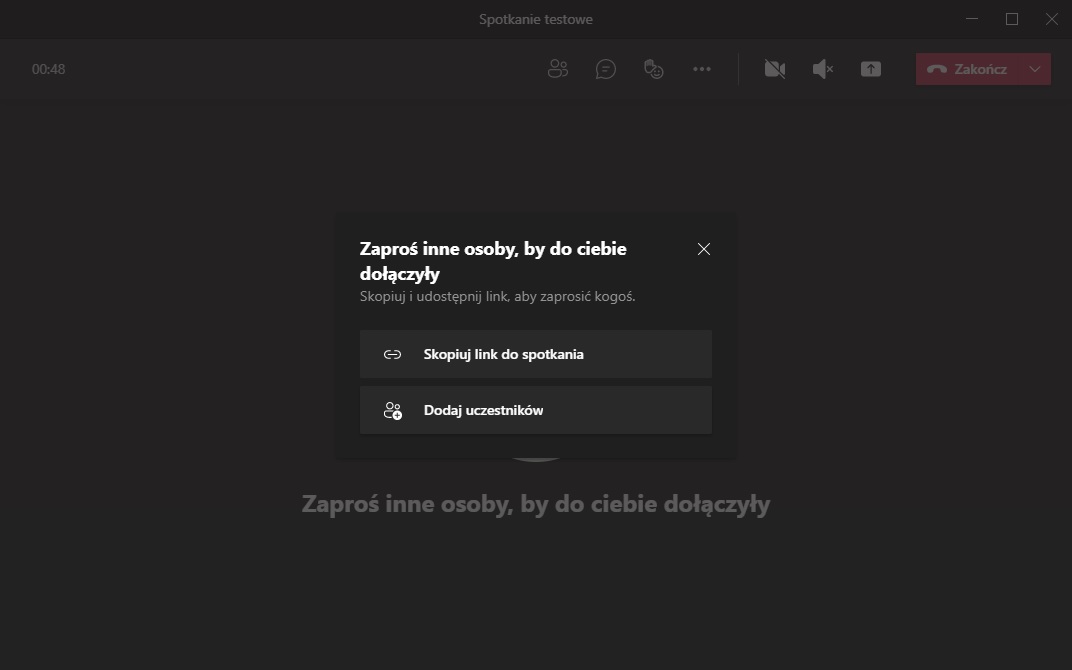
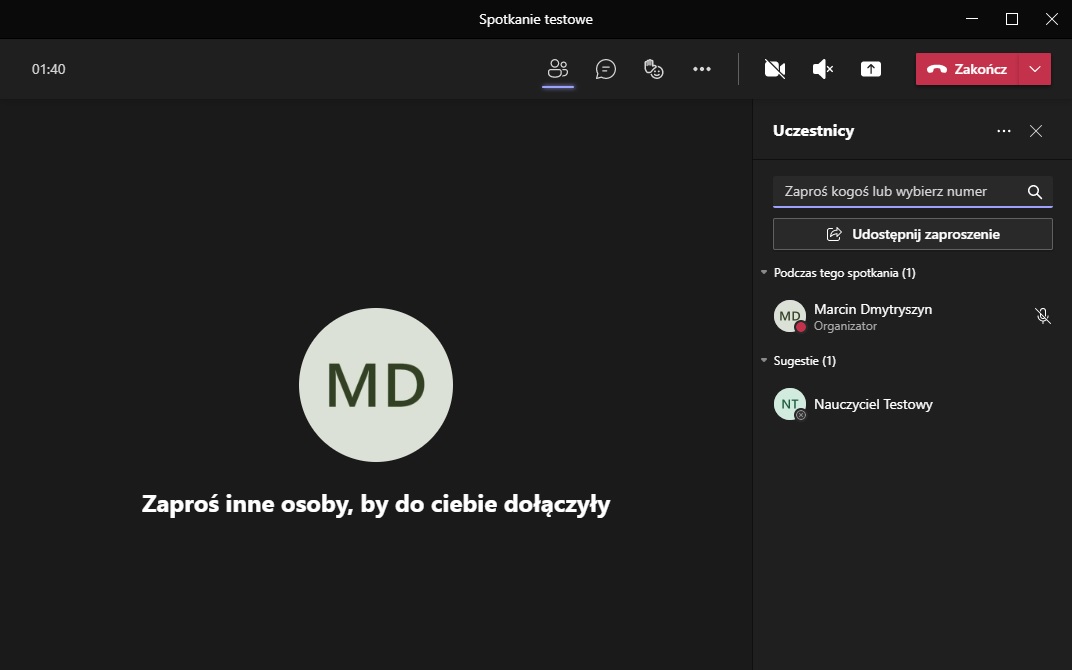
4/10. Wszystkie osoby przypisane do kanału automatycznie zostaną powiadomione o spotkaniu.
Możliwe jest wygenerowanie linku lub wybranie uczestników, którzy mają zostać zaproszeni dodatkowo.
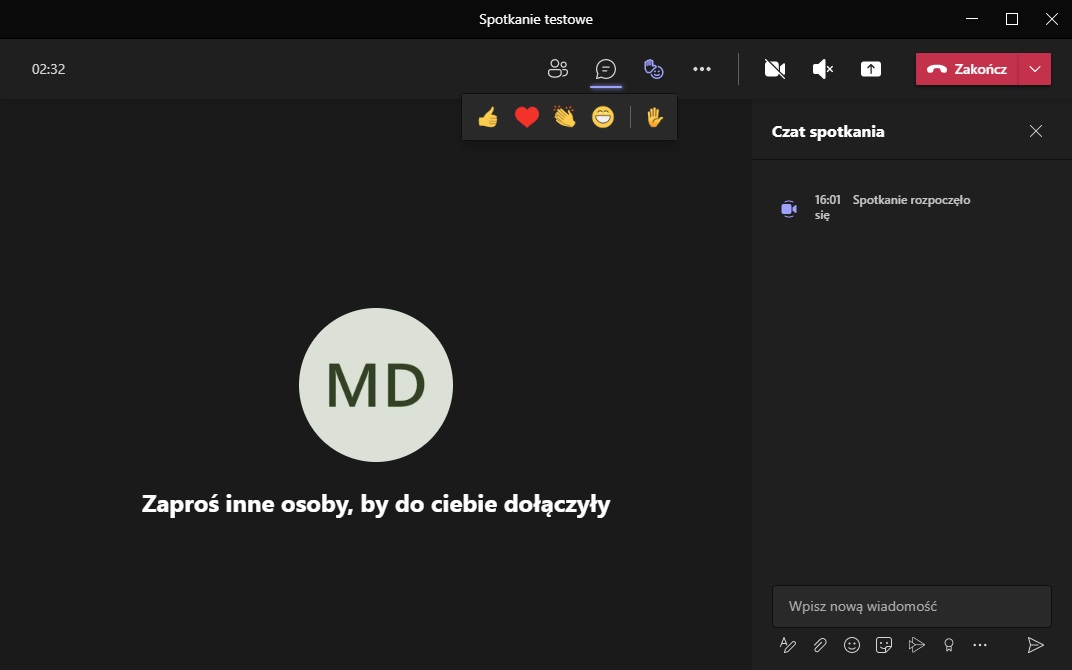
5/10. Z poziomu okna spotkania zyskujemy dostęp do listy obecnych osób, czatu oraz reakcji.
6/10. Po kliknięciu ikony czatu, wyświetla się pasek zawierający czat spotkania.
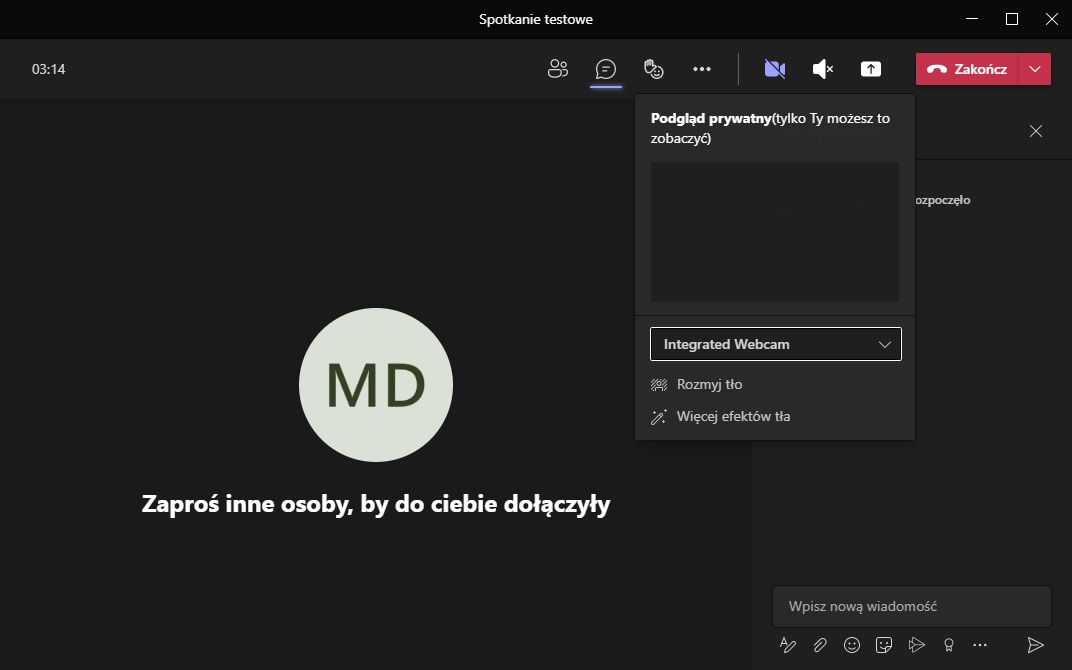
7/10. Kolejna ikona pozwala na włączenie kamery internetowej.
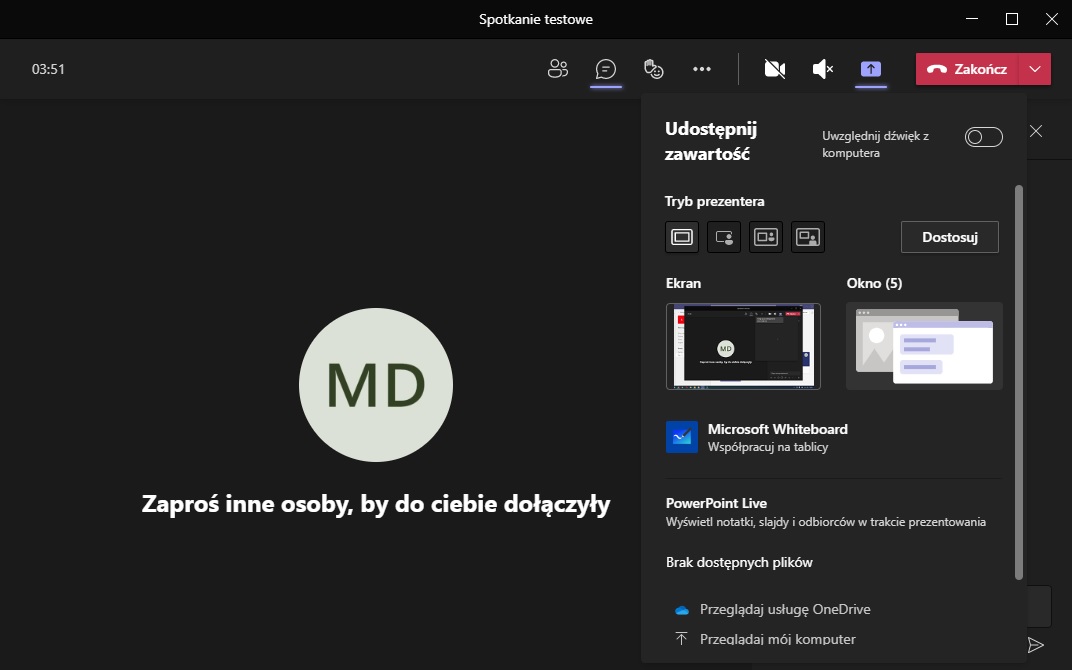
8/10. Ikona udostępniania zawartości pozwala na współdzielenie ekranu lub wybór tablicy "Whiteboard".
Warto zauważyć przełącznik: "Uwzględnij dźwięk z komputera", pozwala on na udostępnianie dźwięku prezentacji lub filmów.
W dalszej części skupimy się na udostępnianiu tablicy.
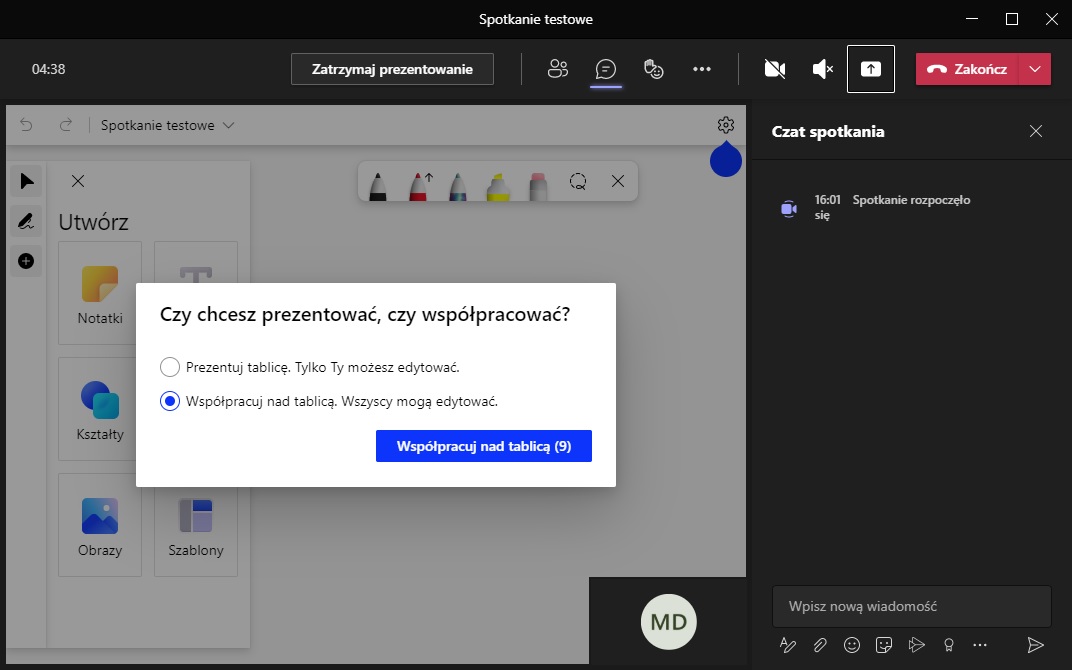
9/10. W aplikacji Whiteboard wyświetlany jest monit o wybór kto ma mieć dostęp do tablicy.
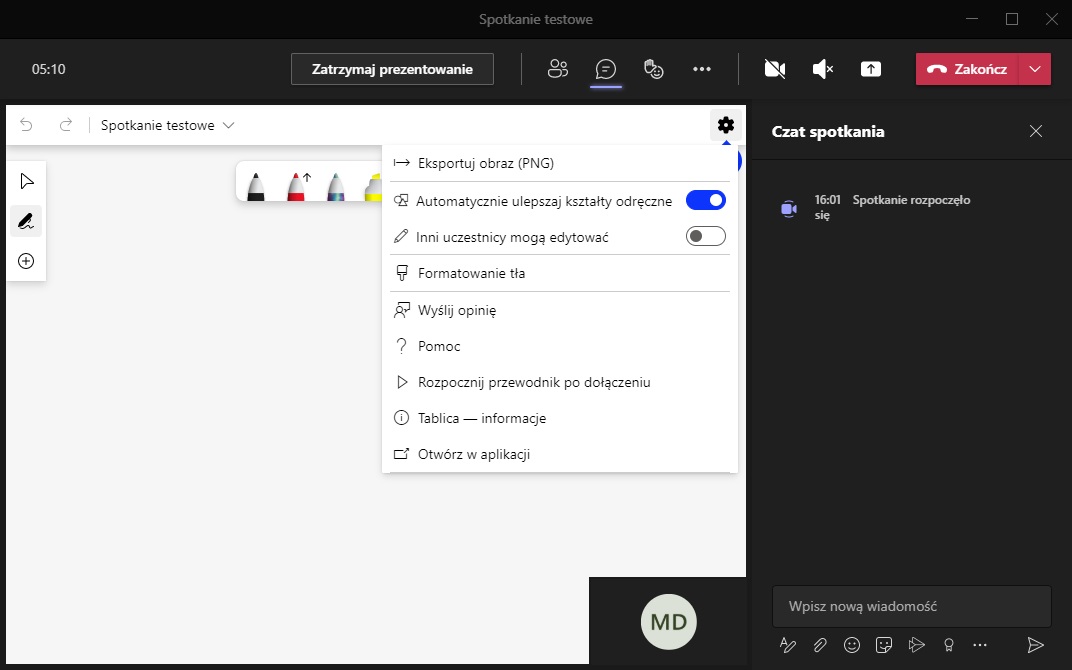
10/10. Z poziomu ustawień istnieje dostęp do:
* zapisania tablicy -> eksportuj obraz,
* włączenia narzędzia ulepszania rysunku odręcznego,
* opcji edycji tablicy,
* formatowania tła.
>